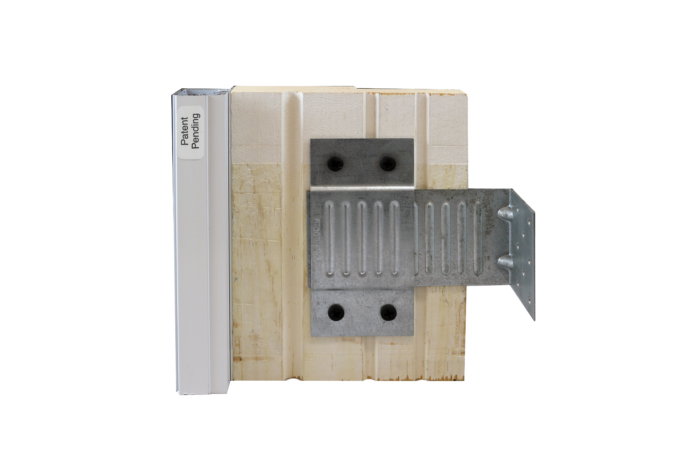
Tru-Loc™ Window & Door Installation Anchor
These anchors resist the Forces of Nature™ by being effective, easy to use, adjustable and durable.The Tru-Loc™ Clip is simple to use, saves money and eliminates callbacks.
Advantages:
- Securely anchors the door to the rough opening
- Keep the door plumb and square
- No more drilling through sidelights
- Speeds up installation
Installation Instructions
The TRU-LOC™ Window & Door Installation Anchor consists of two parts. Part “A” “the bracket” and Part “B” “the angle.” (Figure 1)
If the unit you are installing has Part “A” pre-applied, please start with STEP TWO.
STEP ONE: Installation of Part “A” to the Jamb of the unit to be installed. The Bracket is mounted vertically to outer face of frame using #8 x 5/8” pan head screws. It is very important that the Bracket is mounted squarely. The Bracket is to be mounted no less than 1” and no more than 2” from the interior edge of the jamb. (Figure 2)
STEP TWO: Install unit into opening using conventional methods, making sure that unit is plumb and square in the opening. Conventional shims should be used to create a consistent reveal and proper operation.
STEP THREE: Now that the unit is properly located within the opening, insert the angle into the slot created between the bracket and the jamb. (figure 3) The ribs on the face of both parts will interlock as the angle engages the bracket. Drive the stud or header. (Figure 4) Insert all angles into brackets and recheck door for plumb and square before using nails to secure angles to framing member. (figure 5) The TRU-LOC™ anchor is now installed and will effectively hold the unit in position increasing the longevity of proper operation and function.
TRU-LOC™ Anchors are designed to interlock very tightly, however, if there is the need to remove the anchors after installation, the nails securing the angle to the framing member can be removed and the angle can be disengaged from the bracket by pulling it squarely from the bracket. The use of a small pry bar, claw hammer or pliers may offer some assistance in this removal.


